This is the fifth post in our series on how to use your Redman Real Estate Blog. You can read the other posts in the series here:
Blog How To Series
An easy and effective way to add some visual interest to your blog is the addition of images and other media to your posts. Images act as a banner, drawing users into your blog post. When placed at the top of a blog post, an image gives users an instant clue as to the nature and content that will be presented in the post. Where as the use of images within a post, will break up large walls of text making the message more digestible and easier to read.
If you are a current Redman client and do not have a blog but would like one, or if you want to become a Redman client please contact sales@redmantech.com or call 1.866.425.0022 today.
To get started adding images and other media to your blog posts, follow the steps below.
Step One
Log into your real estate website’s Workstation. On the right side above the calendar there will be a link that will allow you to Access the Blog. Your bar may contain other links as well depending on the products you have purchased. By clicking the Access Blog link, you will automatically be logged into your blog in a new window or tab.

Step Two
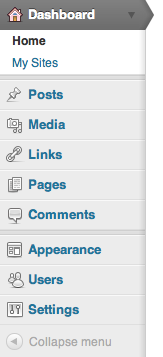
Along the left side of your browser you should see a sidebar that houses the navigation for the backend of your blog. Below Home and My Sites, you should see the button that says Posts.
This Posts button when clicked, will bring you to the Posts’ landing page and expand to give you more post related options. From there, click on Add New.
As a precaution, we suggest that if you are unsure about what the additional features do or how they work that you do not change any of their settings or defaults. The probability of the blog being damaged is extremely high if the wrong option is changed.
Step Three
Begin by writing your post. If you’re not sure what each field is or how to write a basic blog post, you can read our Writing a Post How To guide to get you started.

Above the area where you would write your post, there should be a square icon and an icon that looks like a tiny sun or startburst icon. One will add an image, and the other can be used to add other media (such as pdfs) to your blog post.
Step Four
A pop up box should appear over your website with the following options:

Here you will given the option to load the media from your computer, from an URL or to view media already loaded onto your site.
If you’ve changed your mind and don’t want to add anything, click Cancel.
Step Five
Once the media is uploaded, you will want to fill out some info on picture itself. Although this text is not completely visible on the main site, adding in the photo’s information allows Google to sort and rank your blog appropriately.

Step Six
When all the applicable fields are filled in, choose Insert Into Post. This will add the image wherever your cursor was left in your document.
The same process can be followed via the media button above the area where you write the post.
To learn more about how to use your Redman Blog, check out the Redman Tech Support Site for helpful tips and tutorials.
Want to know why a blog is so important? Read our previous posts on How Blogging Can Boost Your Business and Why Content Matters So Much To Your Real Estate Clients.
Sign-up For FREE Updates